How to Track Permission Changes in Active Directory
Authored by: Support.com Tech Pro Team
1. Introduction
How to Track Permission Changes in Active Directory
2. Step 1: Modify an existing or a new Group Policy Object
Perform the following steps to apply the policy:
Go to “Control Panel†➔ “Administrative Toolsâ€, and double-click “Group Policy Management Console†to access its window.
Navigate to “Forest†➔ “Domains†➔ “www.domain.com†in the left panel.
Right-click “Default domain policy†or any customized domain-wide policy.
Our experts recommended creating a new customized GPO, linking it to the domain and editing it from there. Click the “Edit†option in this menu to open the window of “Group Policy Management Editorâ€.
Go to “Computer Configuration†➔ “Policies†➔ “Windows Settings†➔ “Security Settings†➔ “Advanced Audit Policy Configuration†➔ “Audit Policiesâ€.
Click “Audit Policies†and all of the policies are displayed in right panel.
Double-click “DS Access†to define the required settings.
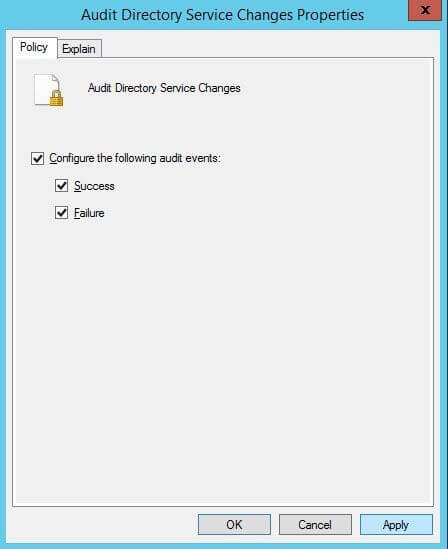
Right-click “Audit Directory Service Changes†policy and click “Properties†option to access policy properties.
Click “Define these policy settings†option to select it.
Click checkboxes of both “Success†and “Failureâ€.
Click “Apply†and “OKâ€.
Close “Group Policy Management Editor†window.
3. Step 2: Enable auditing using ADSI
Perform the following steps to apply policy:
In the “Run†box or “Command Promptâ€, type “ADSIEdit.msc†and press “Enter†key to open its console
Right-click “ADSI Editâ€, a top most node in the left panel.
Select “Connect to†in the context menu to access “Connection Settings†window.
To establish a connection with a naming context, click “Select a well known naming contextâ€.
Click “Default naming context†in the drop-down menu.
Right-click “DC=www,DC=domain,DC=com†under “Default naming context†in the left panel.
Click “Properties†in the context menu to access the properties of above node.
In its window, switch to “Security†tab.
Click “Advanced†to open “Advanced Security Settings†window.
Switch to “Auditing†tab.
To add an auditing entry, click “Addâ€.
In “Auditing Entry†window, click “Select a principal†and add “Everyone†(any specific user, computer, group or service account can be added).
Select “All†in “Types†drop-down menu.
In “Applies to†drop-down menu, select “This object and all descendent objectsâ€.
In “Permissions†section, select only “Modify permissions†option. Uncheck all other permissions.
Click “OKâ€.
You can see auditing entry with this permission in “Auditing†tab of “Advanced Security Settings†window.
Click “Apply†and “OK†to close “Advanced Security Settings†window. It takes you back to “Security†tab for object properties.
Here also, click “Apply†and “OK†to close the properties window.
Close “ADSIEdit†window.
4. Step 3: View the event in Event Viewer
Perform the below-mentioned steps:
In the “Event Viewer†window, go to “Windows Logs†➔ “Security†logs.
Click on “Filter current log†under “Action†in the right panel.
Search for Event ID 5136 that identifies permission changes in Active Directory.You can double-click on the searched event to view “Event Propertiesâ€.
You can also execute the below command in “Active Directory Module for Windows PowerShellâ€. It gives a list of security events with all details:
.png)